Kaleidoscope
- Nov 16, 2025
- 3 min read
Updated: Dec 9, 2025
This project is to create a kaleidoscope based on a single image.

I knew I want a luminous image and a human presence. My thought is it would be nice if the kaleidoscope had some glimmery. Of course the work of Gustav Klimt easily comes to mind.
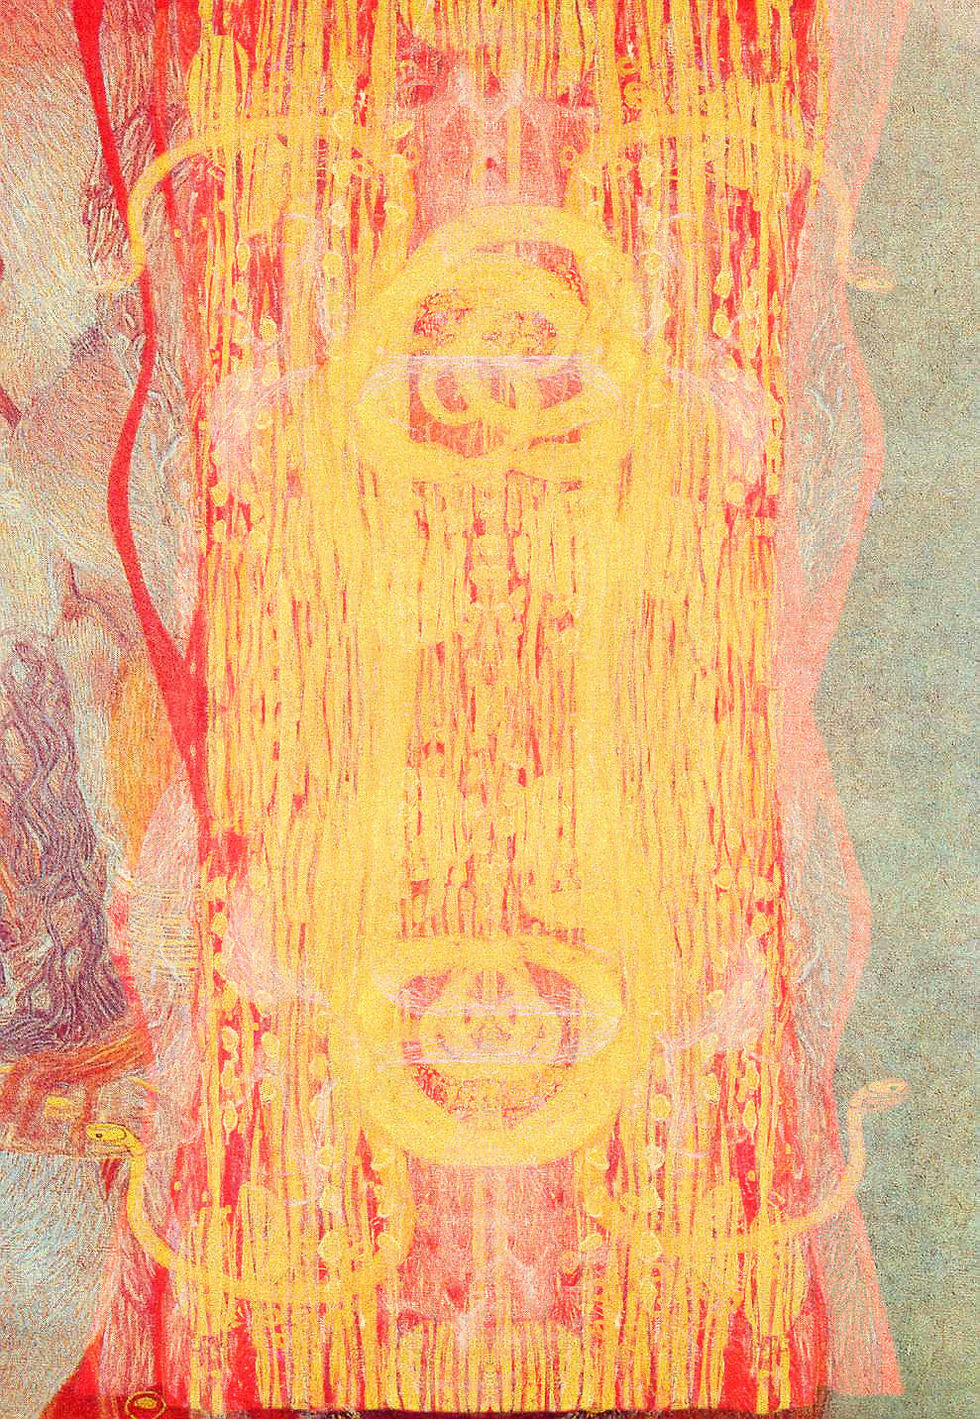
This image is a detail of Hygeia, painted by Gustav Klimt.
It was a section of Klimt's massive painting titled Medicine, which was commissioned for the ceiling of the University of Vienna's Great Hall as part of the Faculty Paintings series (1900–1907).
Hygeia is the Greek goddess of health, cleanliness, and hygiene. She is shown holding the cup of Lethe, with the serpent of Asclepius (a symbol of medicine) coiled around her arm.
Klimt's Medicine painting was highly controversial when first exhibited. Instead of glorifying scientific medicine, the overall painting showed a pessimistic view of the human condition, with life, death, and suffering swirling around Hygeia, who appears detached and turns her back on humanity. The university rejected the work, and it was never installed.
Tragically, the original painting, Medicine, along with its companions Philosophy and Jurisprudence, was destroyed by fire in 1945 when retreating German forces burned the castle where the works had been stored for protection.
The image is based on surviving preparatory sketches and black-and-white photographs of the original work. It is a prime example of Klimt's Art Nouveau style, characterized by rich ornamental patterns and gold leaf.
I don't recall which layer blendmode treatments I chose, but I looked at each variation and chose my favorites.
Because I found our instructor's original text-based instructions to be most helpful, I am including them here. (AACC).
Works Cited
AACC. "Lesson - Digital Kaleidoscope." Introduction to Digital Design, ART-106-200, Canvas, 9 Dec. 2025, aacc.instructure.com/courses.
How it came together
Edit > transform > flip horizontal
Select the first layer and flip it horizontal
Flip the second layer vertically
Flip the third layer both horizontal and vertical
It may be necessary to move the images on all the layers towards the middle of the screen so there is a lot of overlap between the pieces
Change Transfer modes
A drop down menu will appear
Select all of the layers
Click the Transfer Mode button at the top of the layer panel that says Normal by default
Choose Multiply and see results
Optional - Adding another image
At this point it may be necessary to select another element from the original object image to create a background or fill blank regions of the image
Repeat steps 6 through 9 making sure that you start with a duplicate of the background layer (original image) without a mask

Create Variation 1
Save the image as a JPEG
At this point it is safe to crop the image if you wish (sometimes a square may work better with such a symmetrical image)
Create a copy of the collage using File > Save Copy

Create Variation 2 and 3
Select all the layers save the bottom background layer
Click the Transfer Mode button one time to reveal the drop down menu
Click it a second time to close the menu but keep the button selected (it will be outlined in blue)
Now hit the up and down arrows to cycle through the transfer modes
When you find another image that you like save it as the second transfer mode image
Select yet another transfer mode configuration for the third transfer mode variation

Variation 3

Create Variation 4
Now add an adjustment layer
Circle icon to the right of the layer mask button at the bottom of the layer panel
Recommend using Hue/Saturation first
Make adjustments until you find something new you like
Save Copy this forth variation

Create Variation 5
Toggle off the adjustment layer by clicking the eyeball on the left hand side of the layer
Select a second adjustment layer type (such as Curves or Levels)
Manipulate until you get something you like and use Save Copy

Create Variation 6
Disable the second adjustment layer and add a third
Once again manipulate and use Save Copy


Comments